
Available from 26.10 onwards.
- Before you begin
- 1. Install and Configure the Cutter
- 2. Create the Cutting Contour
- 3. Assign Cutting Tools
- 4. Configure Registration Marks and QR codes
- 5. Customize Registration Marks and QR Codes
- 6. Configure White Ink for Register Marks and QR codes
- 7. Check the Print & Cut Layout
- 8. Print&Cut the job
- 9. Virtual pages for Cutting
- 10. Using a trimmer instead of contour cutting
- neoStampa Print & Cut – Previous vs. New Workflow
Before you begin
Prepare the garment film artwork and confirm that the printer and cutter are connected and available on the computer. The workflow consists of two parts:
- printing, where neoStampa adds the required registration information to the job
- cutting, where the cutter reads this information and follows the generated cutting contours.
1. Install and Configure the Cutter
- Open the document in neoStampa and go to: Properties → Document → Cutting plotter
- Below Properties, click on Configure....
- To install a new cutter: Click Add....
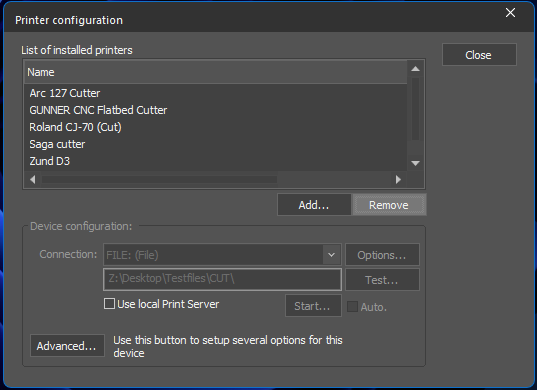
- Select the cutter model.
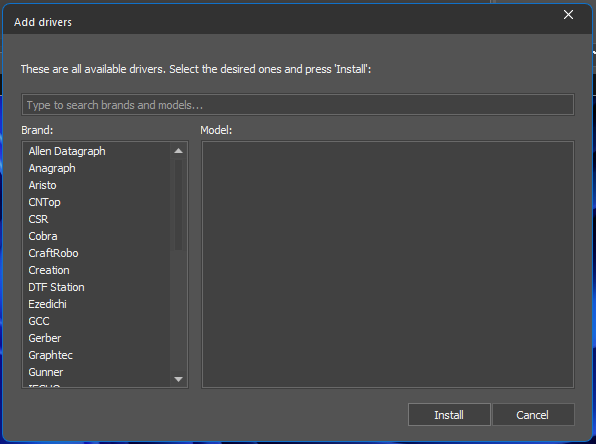
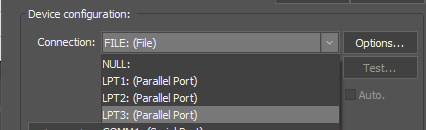
Configure the connection used by the cutter.
- You can change the connection values (IP address, etc.) through the Options... button. To do this, select the printer from the list and then select the required type of connection in the Connectivity section.
- The Test… button on the lower part of the window checks the connection.
- The most common connection for cutting plotters is FILE, you just need to set up the route where you want your files to be exported.
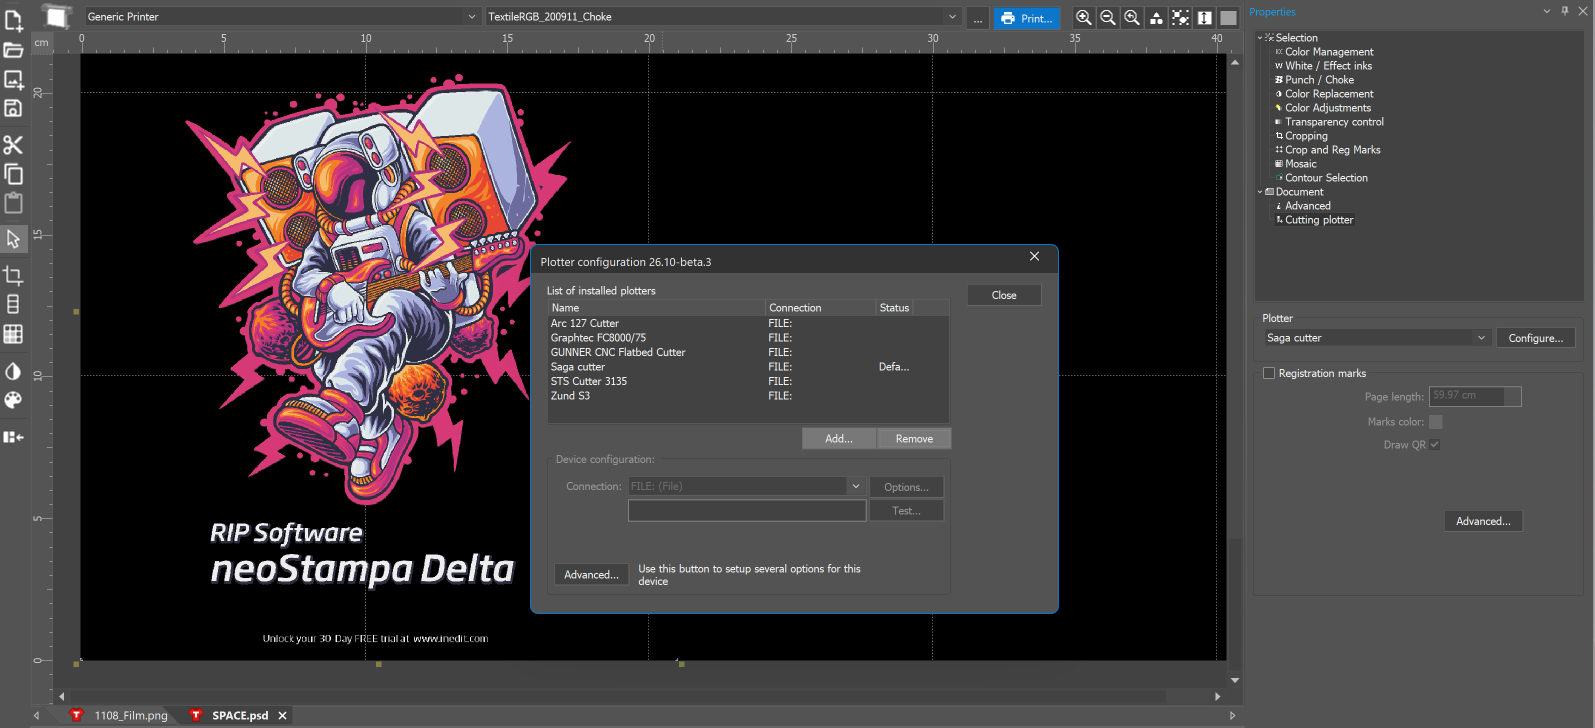
Select the newly installed cutter.
If required, set it as the default cutter.
The cutter will then become available from the Plotter drop-down in the Cutting plotter section.
Advanced cutter configuration
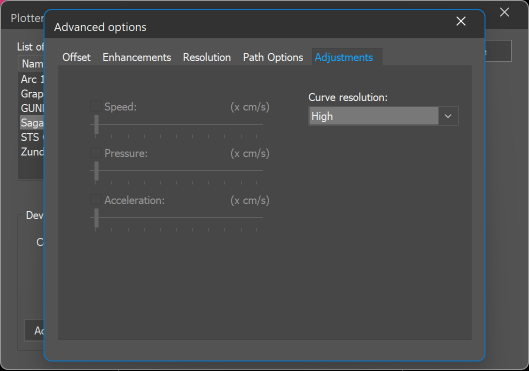
From Plotter configuration, select the cutter and click Advanced... to access several cutter-specific settings.
The default advanced settings should normally be kept unless the cutter requires specific calibration or behavior.
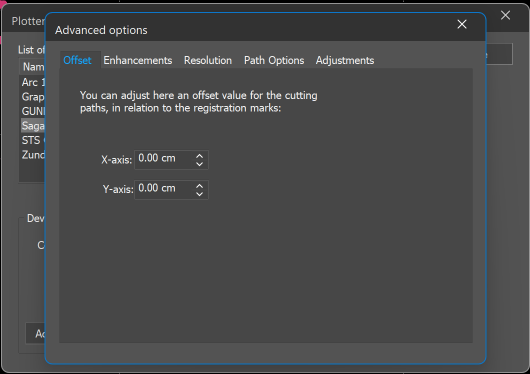
- Offset allows you to compensate for differences between the printed registration marks and the actual cutting position. Adjust the X-axis and Y-axis values when the cut is consistently displaced from the printed image.
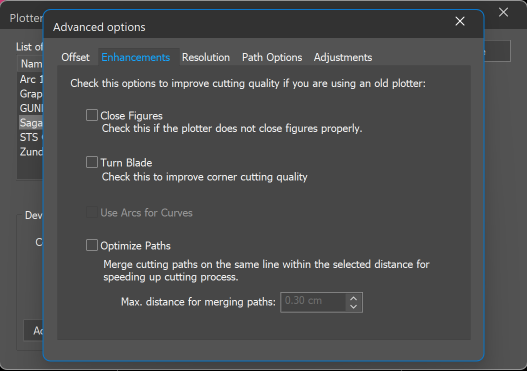
- Enhancements contain additional options for improving cutting behavior. Depending on the cutter, these can include Close Figures, Turn Blade, and Optimize Paths.
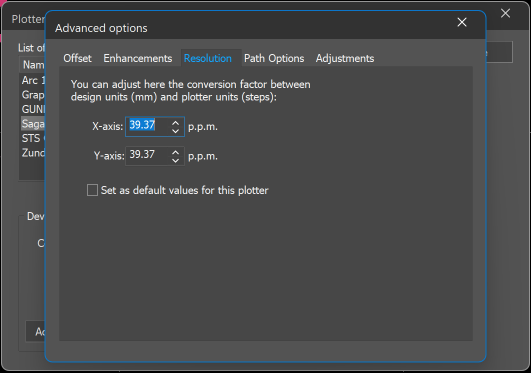
- Resolution defines the conversion between design dimensions in units and the cutter's internal steps. The X and Y values can be adjusted independently. Use Set as default values for this plotter when the configured values should become the default for that cutter.
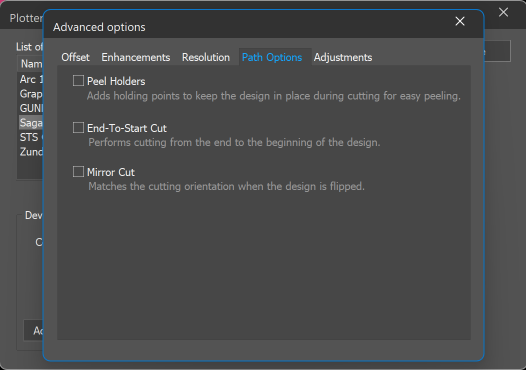
- Path Options provides additional cutting behavior such as Peel Holders, End-To-Start Cut, and Mirror Cut.
- Adjustments contain cutter-specific parameters such as speed, pressure, acceleration, and curve resolution. The available controls depend on the selected cutter.
2. Create the Cutting Contour
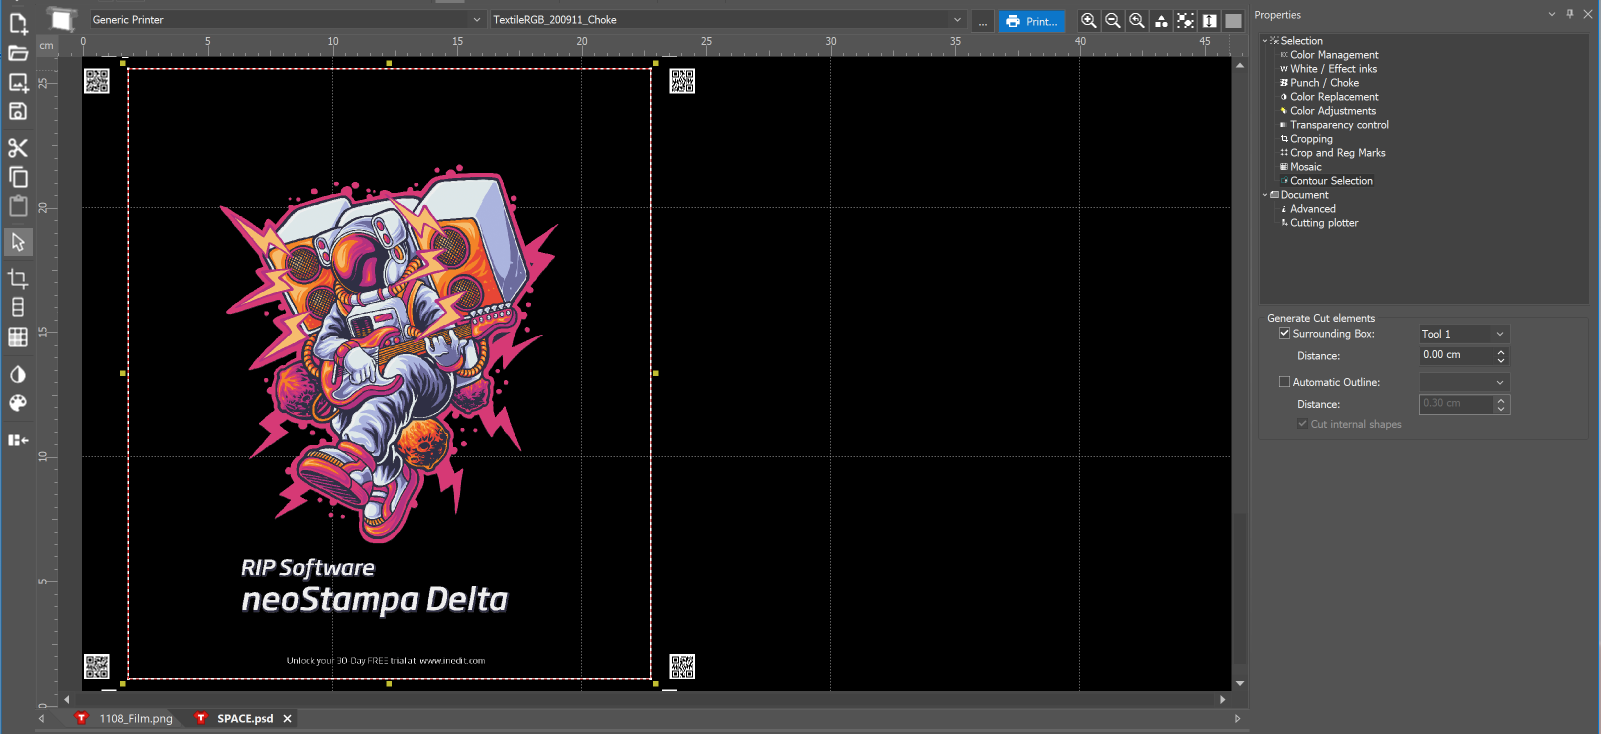
- Open the document in neoStampa and go to: Properties → Selection → Contour Selection
- The Generate Cut elements section provides two methods for creating cutting paths.
Surrounding Box
- Enable Surrounding Box when a rectangular cutting path around the selected object is required.
- Set the desired Distance between the design and the surrounding cut.
- This can be useful when separating complete transfers or sections instead of cutting around the exact artwork shape.
Automatic Outline
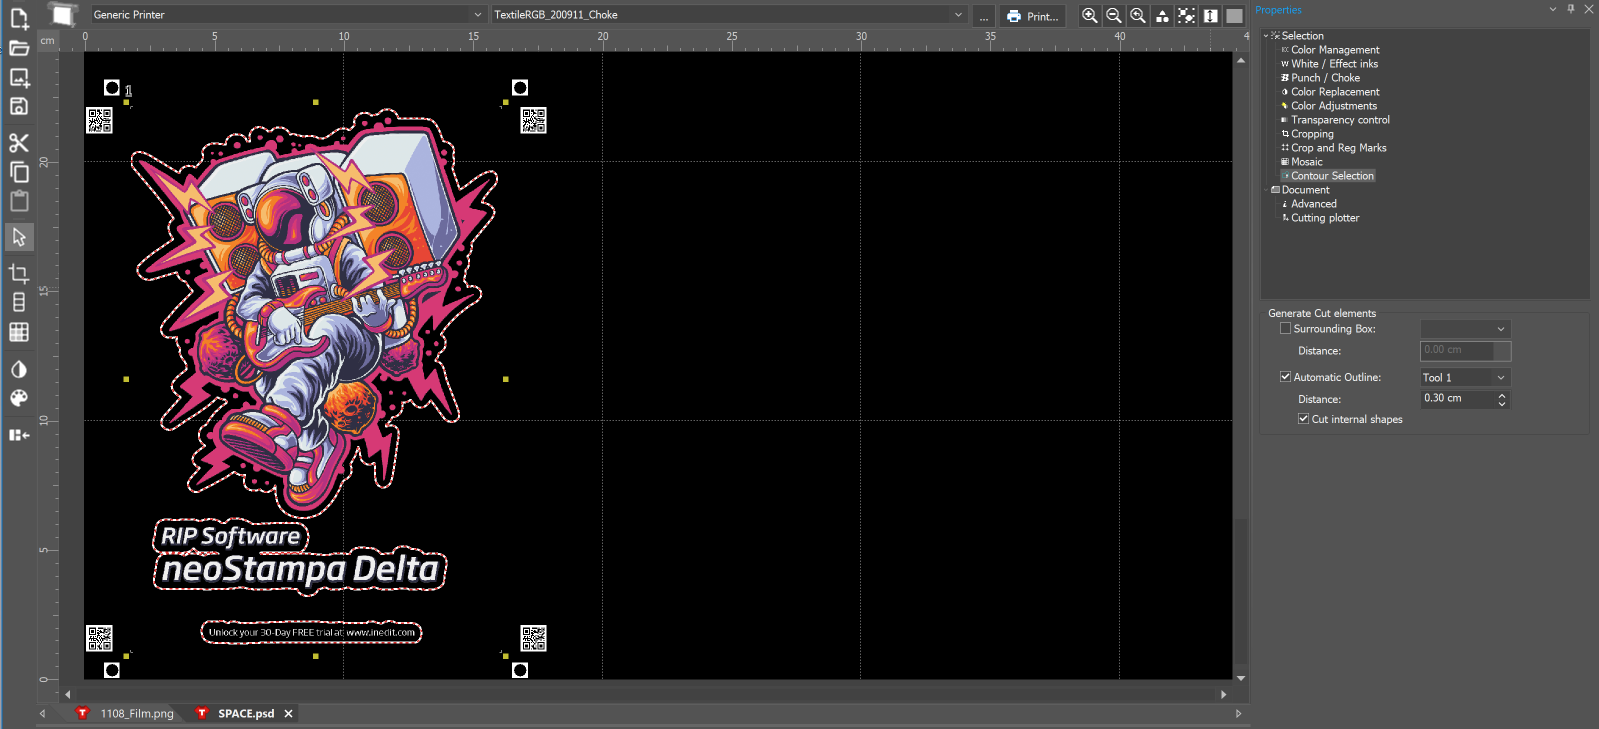
- Enable Automatic Outline to generate a contour following the shape of the artwork.
- Set the required Distance between the artwork and the cutting line. For example: Distance: 0.30 cm
- Enable Cut internal shapes when internal transparent areas or holes should also be cut.
3. Assign Cutting Tools
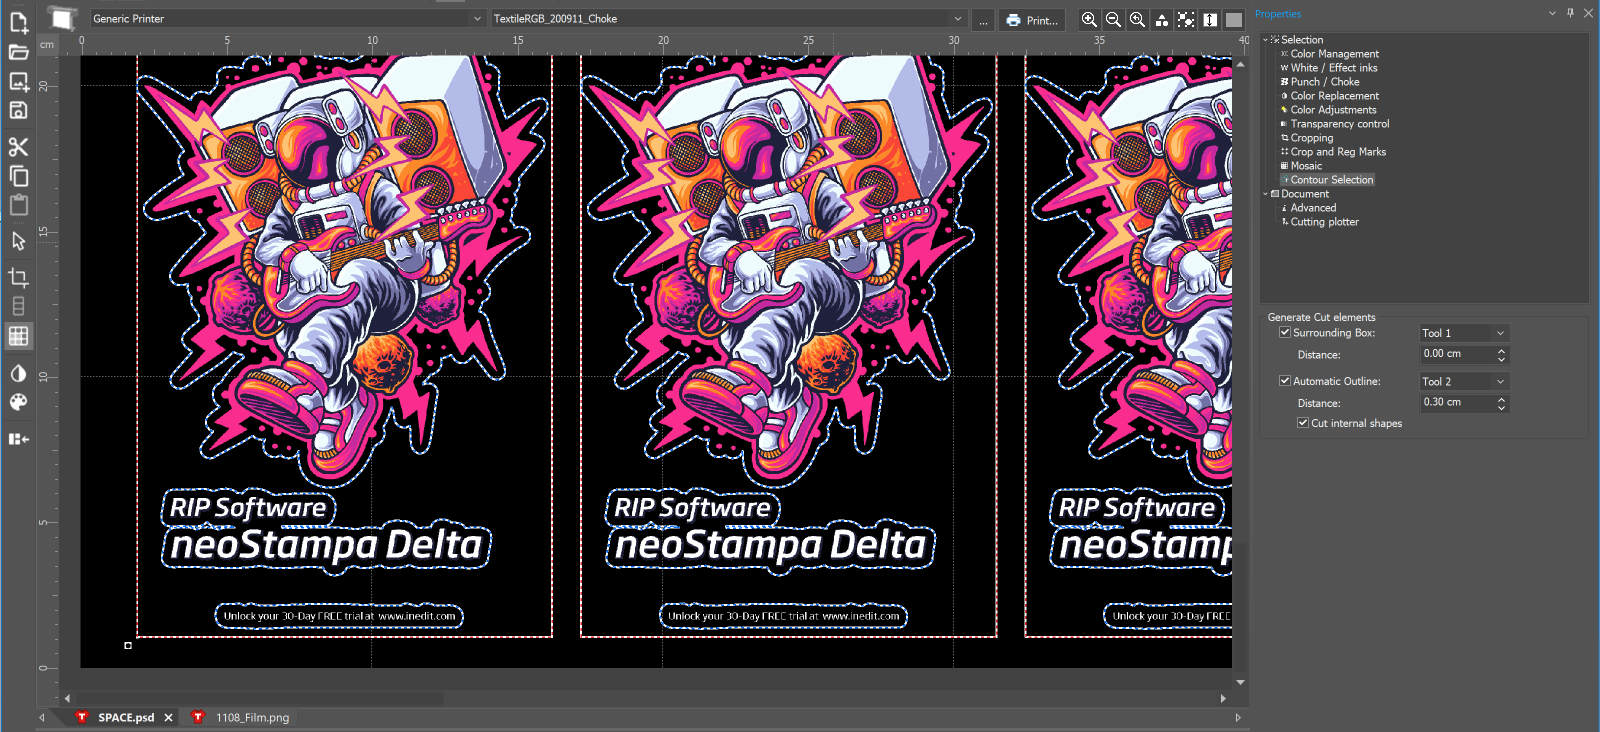
Each generated cutting element can be assigned to a cutter tool.
For example:
- Automatic Outline → Tool 1 and
- Surrounding Box → Tool 2
This allows different cutting operations to be included in the same job.
A typical configuration could use:
Tool 1 for the contour around the design.
Tool 2 for an outer box or another cutting operation.
The available tools depend on the capabilities and configuration of the selected cutter.
4. Configure Registration Marks and QR codes
- Go to: Properties → Document → Cutting plotter
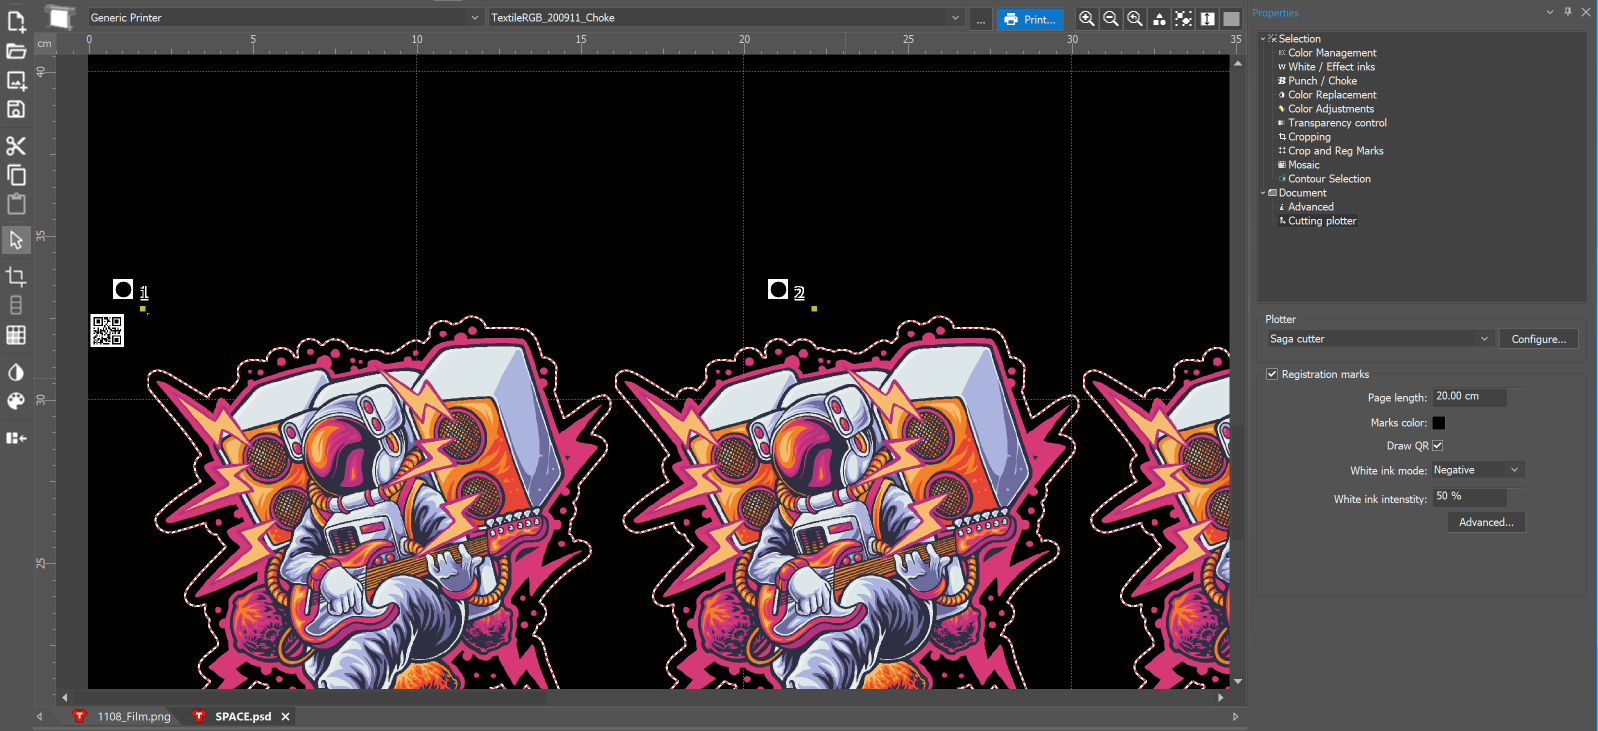
- Enable Registration marks. Registration marks provide reference points that allow the cutter to align the cutting paths with the printed artwork.
- Set the Page length to define the maximum length of each cutting section. For example, a page length of 20 cm creates registration sections at that interval, while a larger value can be used for longer sections. The appropriate value depends on the media, cutter, and total job length.
- In the same Cutting plotter section, enable: Draw QR. neoStampa adds QR codes together with the registration information. The QR code can be used by compatible Print & Cut workflows to identify the corresponding cutting job.
- White ink mode defines the behaviour of the marks and QR codes to improve readability on the cutting plotters.
- Default prints the marks in the defined color with a layer of white ink on top.
- Don't use only prints the color we've defined for the marks, but no white ink on top.
- Negative prints the marks with the defined color and a white area around. This option is generally used when printing DTF as it allows the cutting plotter to read the marks from both sides of the film.
- White ink intensity lets the user adjust the quantity of white ink used to prevent excess ink from flooding over and rendering the QR codes or the position points illegible.
Some plotters can only read a QR code up to a certain size or version, so the QR neoStampa generates sometimes is limited to 8 characters or 15 numbers. If you activate the QR and nothing appears, please change the name on the job tab to a group of numbers and check again.
Print file information
From the Crop and Reg Marks property, the option Print file information will print information at the end of the print, similar to the page statistics.
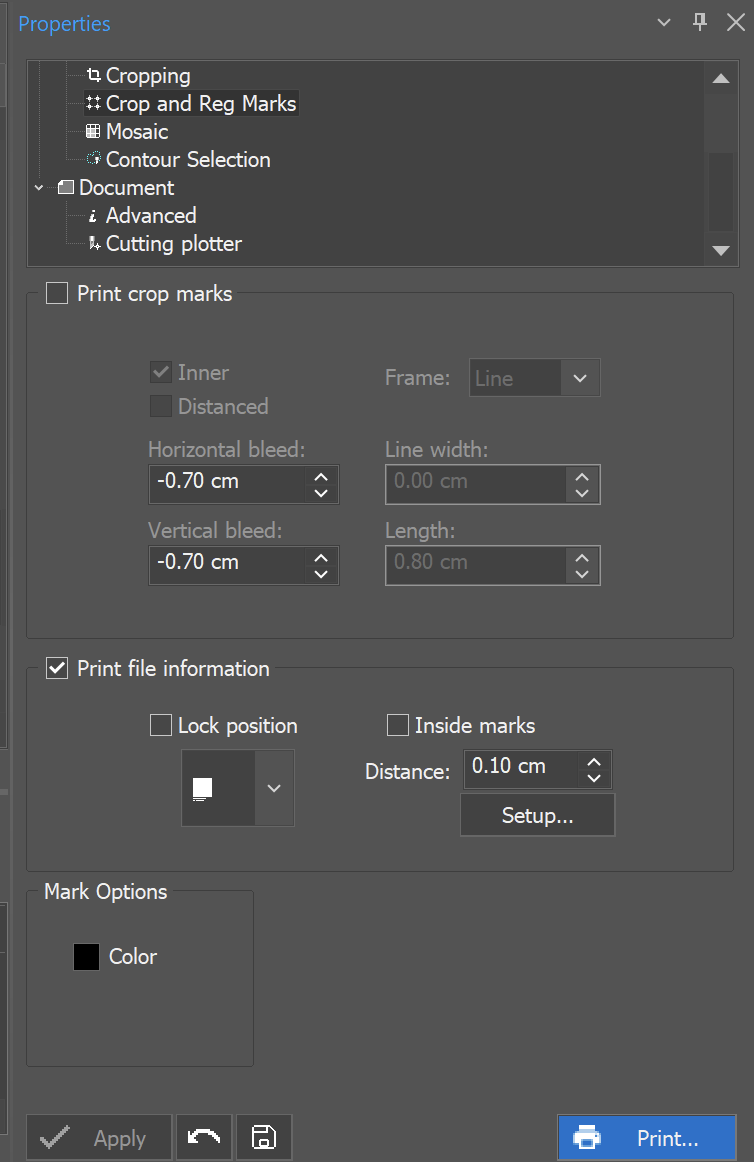
With enabling Inside marks, it allows to print the information so the information is inside the cutting zone.
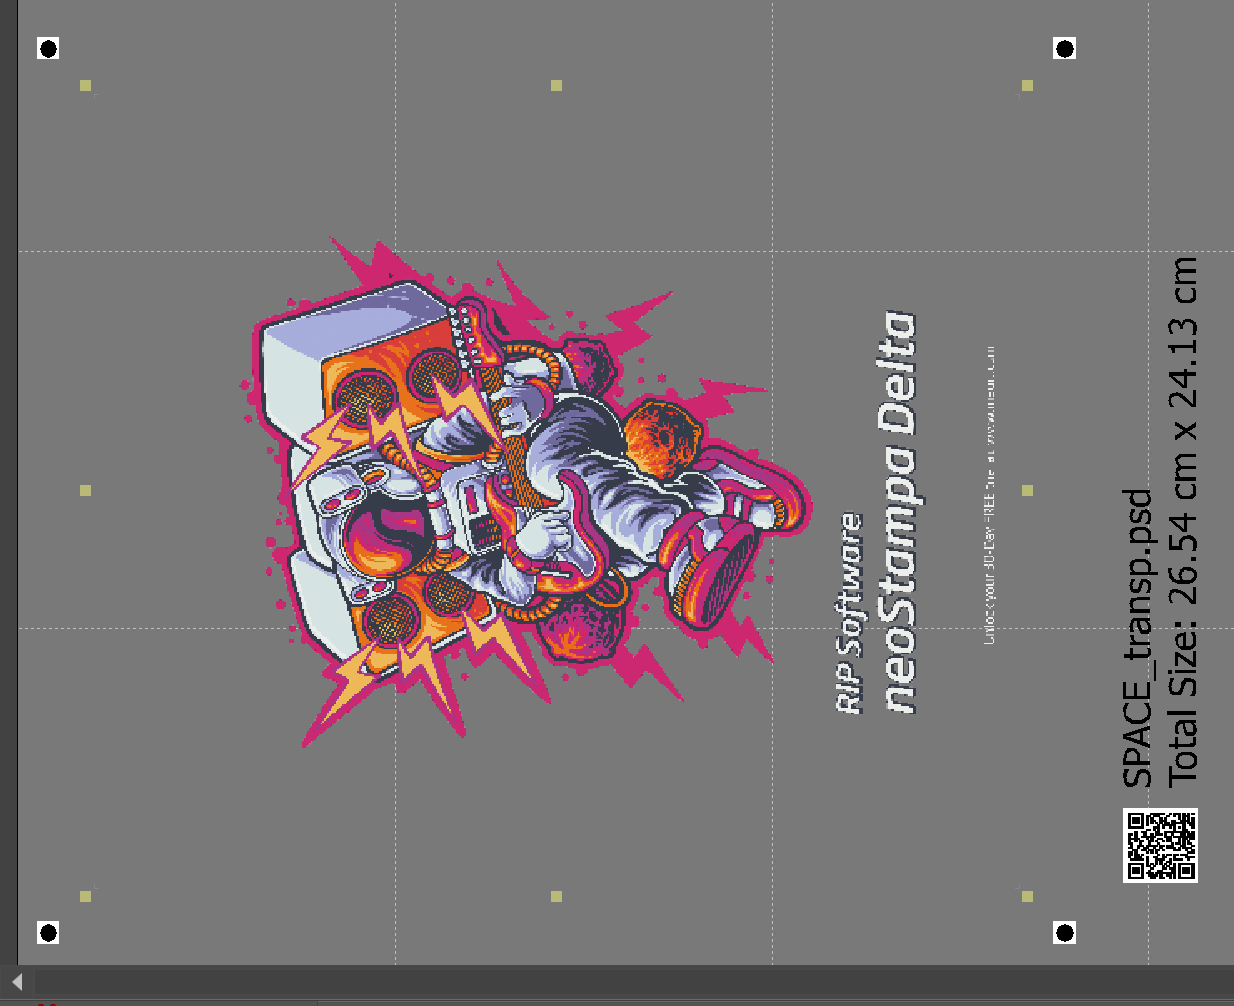 Document information with Inside marks off. | 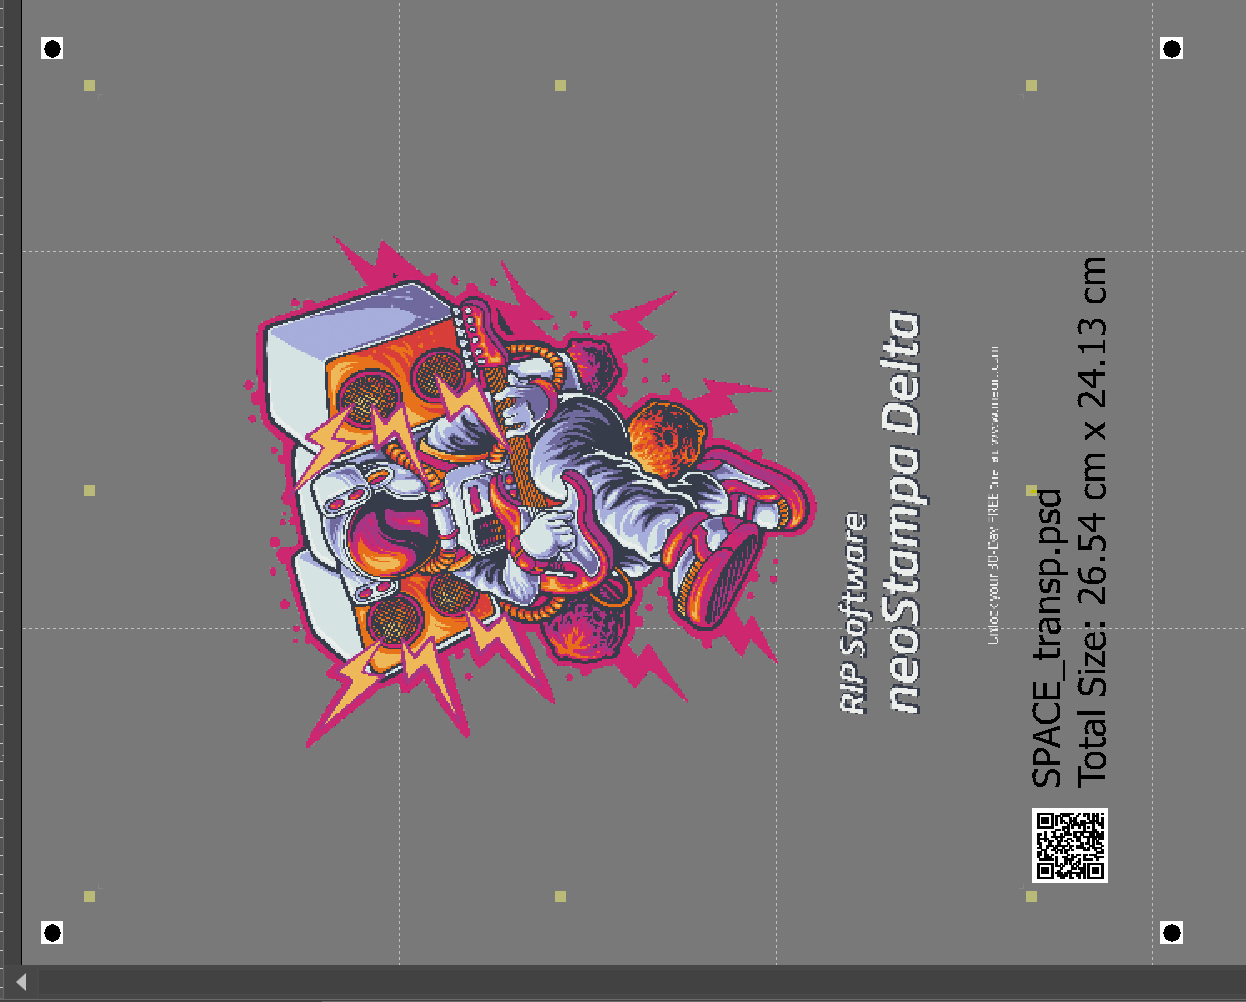 Document information with Inside marks active. |
5. Customize Registration Marks and QR Codes
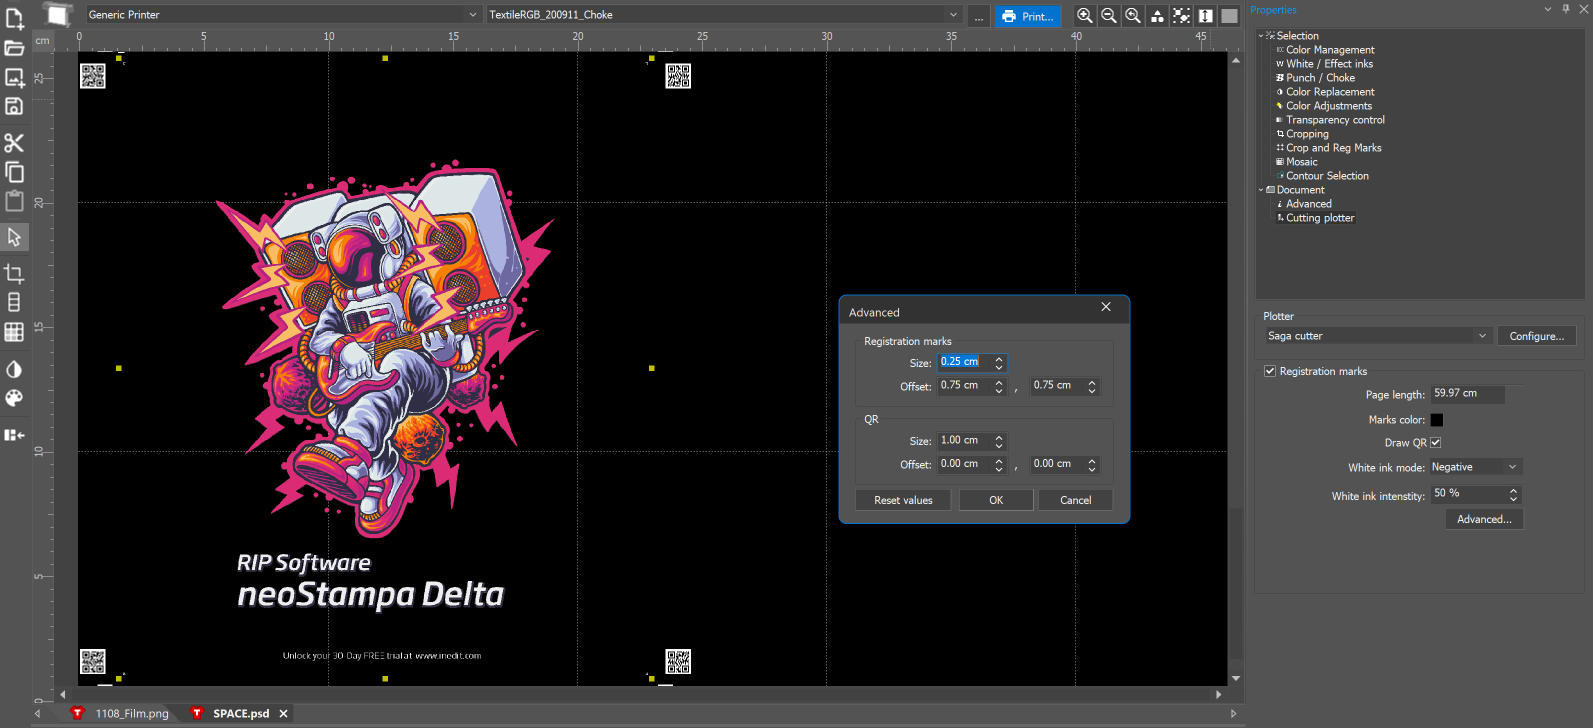
- Go to Properties and click Advanced... in the Cutting plotter section.
- The Advanced window allows you to customize the dimensions and position of both elements.
- Registration marks
- Size – controls the size of the registration marks.
- Offset X / Y – controls their horizontal and vertical distance from the page/job.
- QR code
- Size – controls the QR code dimensions.
- Offset X / Y – changes the QR code position relative to its default location.
- Registration marks
- Click OK to apply the configuration.
- Use Reset values if you need to restore the default settings.
6. Configure White Ink for Register Marks and QR codes
When the cutting workflow uses white ink, configure it from the Cutting plotter section.
- Select the required White ink mode, for example: Negative
- Then configure the White ink intensity, such as: 50%
- The appropriate mode and intensity depend on the garment printing configuration and print scheme.
7. Check the Print & Cut Layout
Before printing, inspect the complete job in the workspace. Verify that:
The cutting contour follows the intended design.
Internal shapes are included or excluded as required.
The correct cutting tool is assigned to each contour.
Registration marks are positioned outside the artwork.
QR codes are visible and unobstructed.
The page length creates suitable registration sections.
No artwork overlaps the registration marks or QR codes.
Do not modify the scale of the printed output between printing and cutting, as this can cause registration errors.
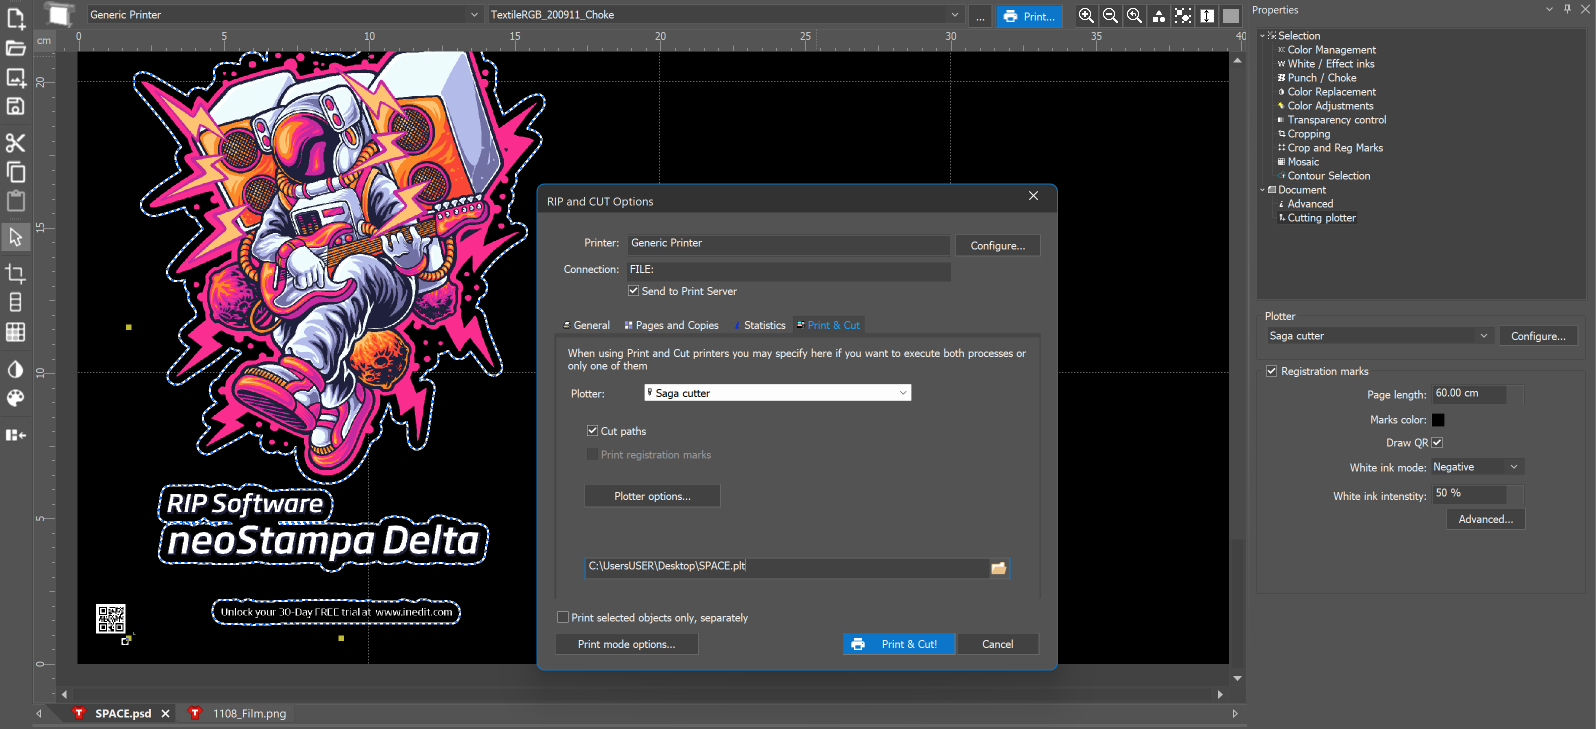
8. Print&Cut the job
Once the layout is ready, send the job to the printer using the normal neoStampa printing workflow with Print&Cut in the RIP options window. The printed output contains the artwork together with the configured registration marks and QR codes.
9. Virtual pages for Cutting
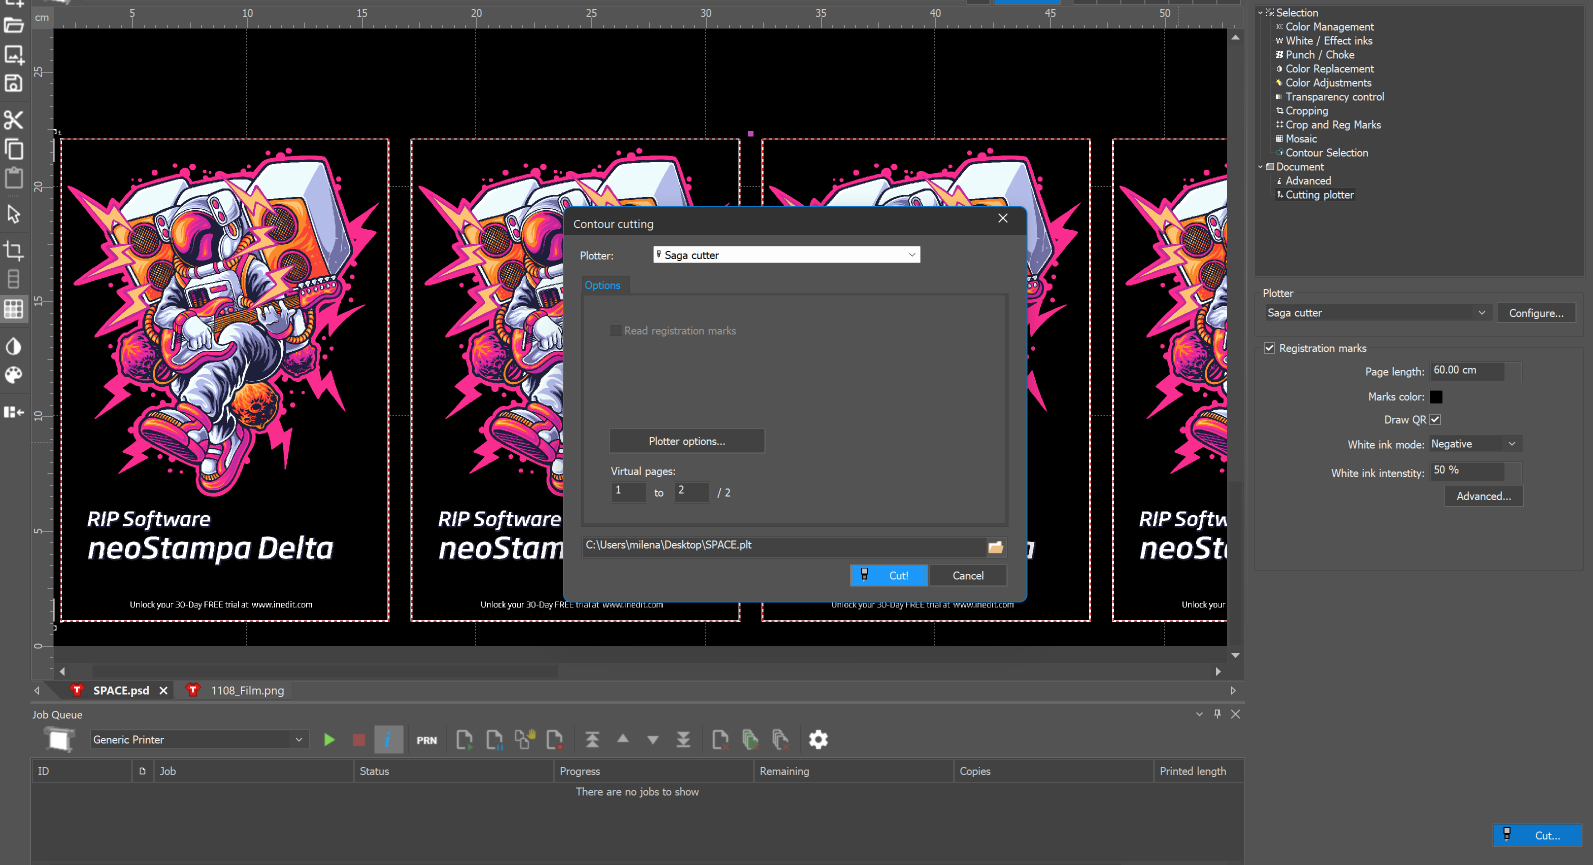
A printer can print continuously from a roll, while a cutting plotter has a limited cutting area. Virtual pages divide a long roll into smaller cutting sections based on the plotter's maximum working length. The plotter cuts one virtual page, advances the media, cuts the next page, and continues until the job is complete.
Virtual Pages also make it possible to resume an interrupted job. For example, if cutting stops at page 8 of 10, you can continue by selecting Virtual pages 8–10 instead of restarting the entire job.
Virtual Pages affect the cutting process only. They do not change the printing page size.
When the printed media is ready, click Cut... from the Cutting plotter section. neoStampa displays the available Virtual pages. This allows you to select which section of a larger job should be sent to the cutter.
10. Using a trimmer instead of contour cutting
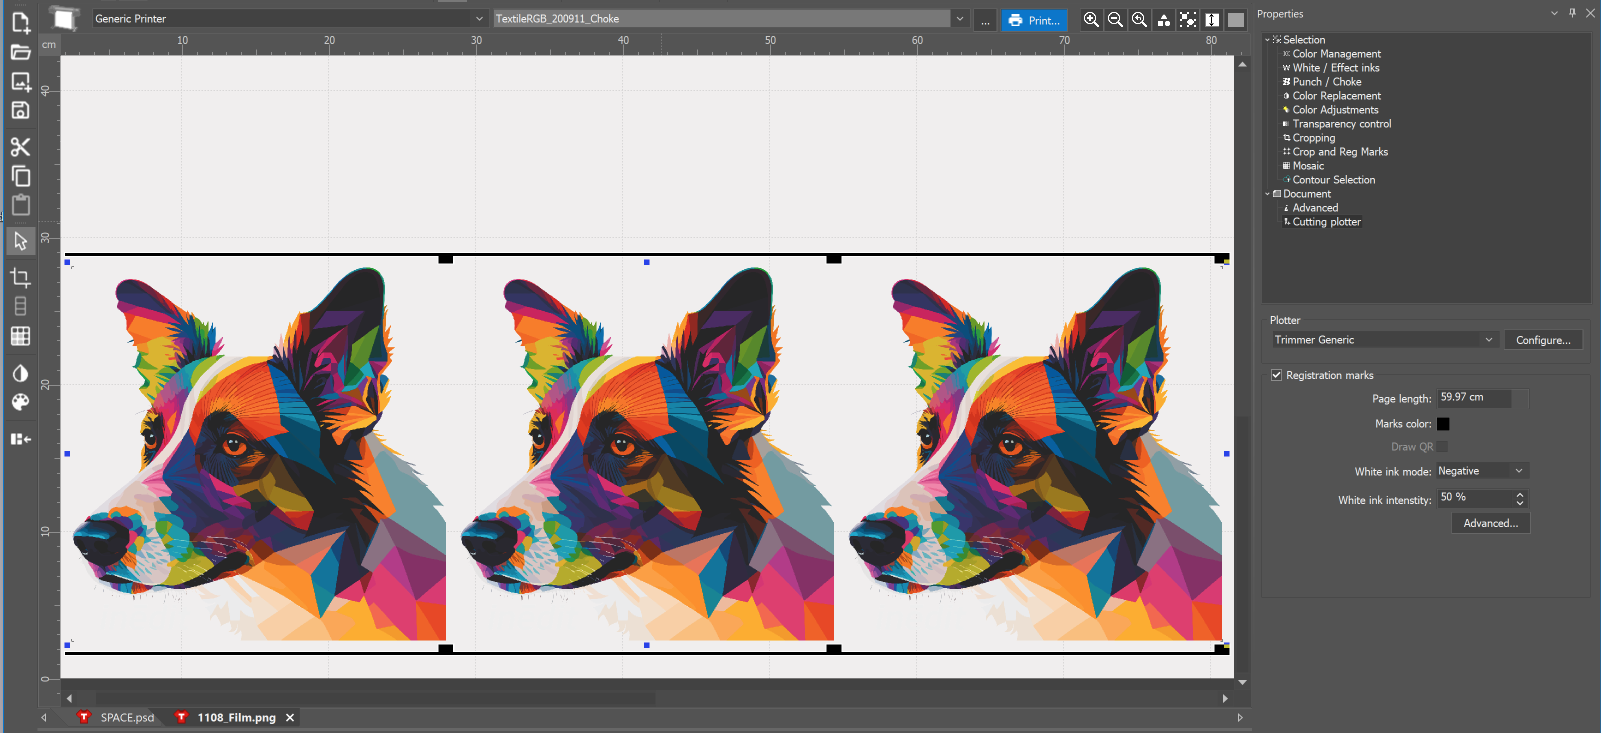
For workflows that require straight separation cuts rather than shape cutting, select a compatible trimmer, such as Trimmer Generic, as the plotter. Registration marks and page length can still be used to divide the printed production into defined sections. This workflow is useful when the goal is to separate rows or production sections rather than cut around each individual design.
neoStampa Print & Cut – Previous vs. New Workflow
Main improvement in v26.10: Cutter-specific settings have been moved from the final Cut dialog into the Plotter Configuration window. This simplifies the cutting process, improves consistency between jobs, and introduces flexible tool assignments and more control over registration marks, QR codes, and virtual pages.
| Area | Previous behavior | New behavior (v26.10) |
|---|---|---|
| Cutter installation | Cutters were added through Document → Cutting plotter → Configure. | Same workflow. Plotter Configuration remains the central place to manage cutters and connections. |
| Advanced cutter settings | Options included Offset, Plotter Control, Enhancement and Resolution. Other settings were available in the Cut dialog. | Reorganized into five tabs: Offset, Enhancements, Resolution, Path Options and Adjustments. |
| Peel Holders | Configured in the final Cut dialog. | Moved to Advanced → Path Options. |
| Reverse / End-to-Start cutting | Reverse Cut was selected in the final Cut dialog. | Renamed to End-To-Start Cut and moved to Advanced → Path Options. |
| Mirror Cut | Selected in the final Cut dialog. | Moved to Advanced → Path Options. |
| Optimize Paths | Configured in the final Cut dialog, including maximum merging distance. | Moved to Advanced → Enhancements, including Max. distance for merging paths. |
| Speed / Pressure / Acceleration | Available in the final Cut dialog, depending on the cutter driver. | Moved to Advanced → Adjustments. |
| Curve resolution | Configured during cutting path generation. | Available under Advanced → Adjustments, with selectable resolution levels. |
| Contour generation | Cut surrounding box and Cut shape outline generated automatic contours. | Renamed to Surrounding Box and Automatic Outline under Generate Cut elements. |
| Internal shapes | Internal shape cutting was supported from v26.3.1. | Cut internal shapes is now directly available below Automatic Outline. |
| Multi-tool | Two-en mode used fixed assignments: Cutter 1 for shape outlines and Cutter 2 for surrounding boxes. | Each generated cut element can be assigned a different cutting tool. |
| Registration marks | Enabled through Cutting plotter, with predefined shapes and positions. | Same workflow, with additional customization options. |
| Registration mark size / position | Based mainly on predefined cutter settings. | Advanced settings allow custom mark size and X/Y offset. |
| QR code | Draw QR generated a code containing the job name. | QR code size and X/Y offset can now be customized. |
| Marks / QR color | One Marks color setting controlled registration marks and QR codes. | Same functionality remains available. |
| DTF white ink | Default, Don't use and Negative modes controlled white ink around marks and QR codes. | Same functionality remains, including White ink mode and intensity. |
| Page length | Split long print jobs into multiple cutting pages. | Same functionality, with sections explicitly managed as Virtual pages. |
| Final Cut dialog | Included Peel Holders, Reverse Cut, Mirror Cut, Optimize Paths and cutter parameters. | Simplified to focus on Plotter, Plotter options, Virtual pages, output path and Cut. |
| Virtual pages | Long jobs were divided into sequential cutting pages. | Operators can explicitly select a page range, such as 1 to 2 / 2. |
| Trimmer workflow | Primarily focused on contour-cutting plotters. | Supports Trimmer selection for registration- and page-based straight cutting workflows. |