The nS QuickPrint Panel is the panel for Adobe® Photoshop® and Illustrator® which allows and offers the connection to Print Server to send and print files from your Adobe® Photoshop® and Illustrator®.
TABLE OF CONTENTS
neoTextil 2025
The nS QuickPrint Panel seamlessly integrates with the nT Job Queue Panel and Apple Silicon compatibility, enhancing your workflow efficiency. Easily send print jobs from the nS QuickPrint Panel to the nT Job Queue Panel for a more connected and streamlined printing experience. The tools are compatible with neoTextil 8.
To get started, display the drop-down options list from Plug-ins | neoTextil, and finally, click nS QuickPrint.

The option to connect with Print Server using Bonjour is not available in this release.
Connect with neoStampa's Print Server
The first time you open the panel, you need to establish a connection to the Print Server to send your designs to the printer. In the Print, Server workstation start your Print Server process so that it remains active.

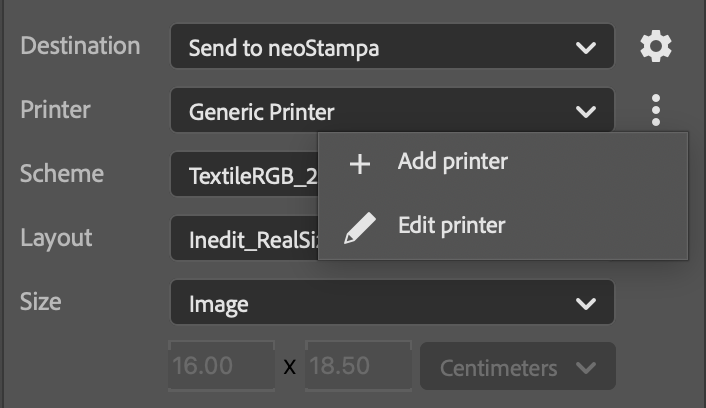
1. To create the connection, click on the sub-option 'Add printer' button. Next to it you have settings to enable or disable xjb job generation.

2. Introduce the URL and port of your Print Server queue. With option 'Print straight' the job is automatically enabled in the printing queue upon arrival.

- Security token: If your Print Server uses a 'Security token' to establish a connection in the Log system, you will need to use the token for the connection. The required field for the token will be present the moment you try to connect to the Print Server. Simply copy the token in Print Server, paste it into the nS QuickPrint Panel, and continue with 'Ok'.

3. With a successful connection, you will have the schemes and layouts of your configured Print Server synchronized where you can see the preview and customize your print job.
4. Download neoCatalog layouts to create new jobs when connected to neoCatalog via the neoCatalog panel. This functionality enables the sub-option to download layouts for job creation within the QuickPrint Panel.

Customize your print job
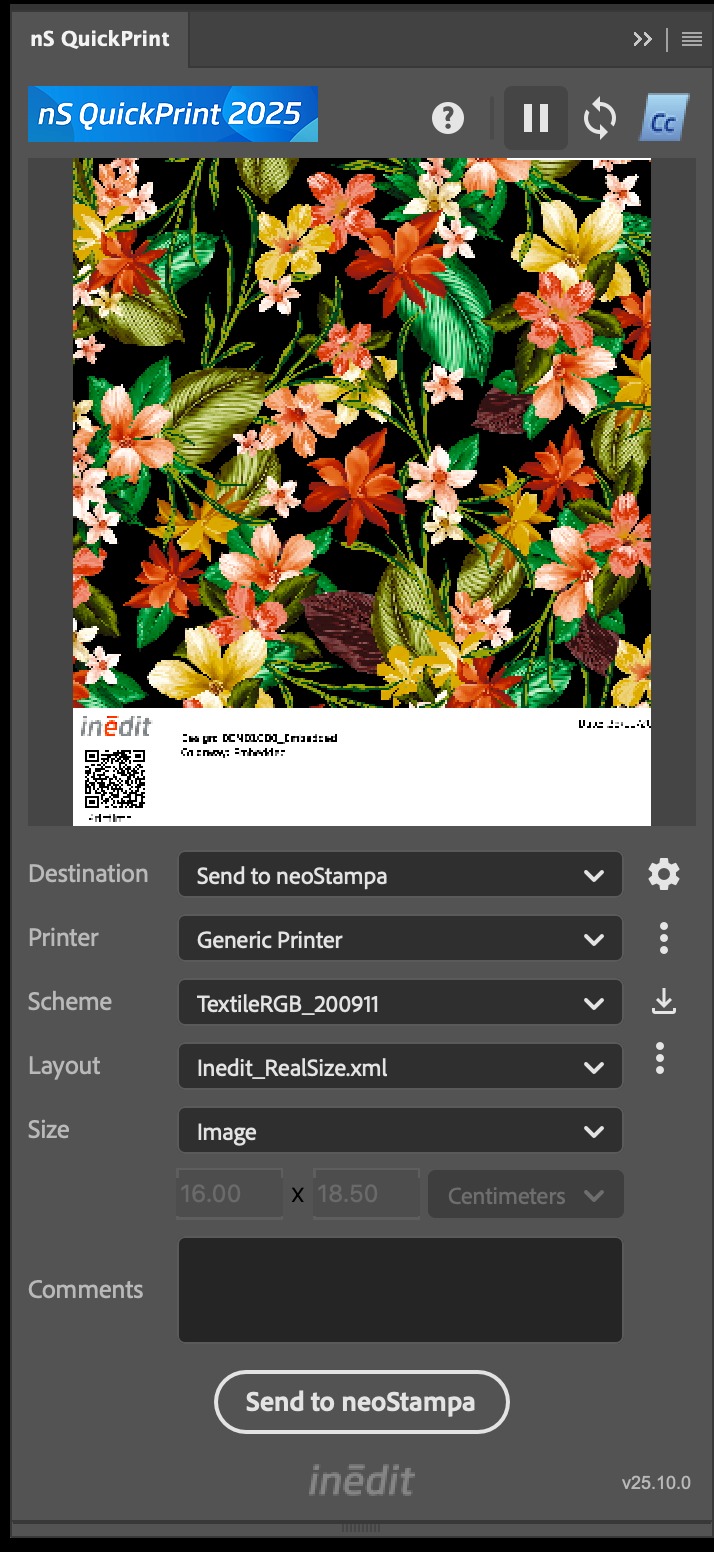
Having a document open, in the panel you can see the preview and options to choose to send your print document:
- Scheme: Here you can choose the schemes that are available for the printers. With the download icon, you can get the schemes copied locally in your computer in /Users/Shared/Inèdit Software/ InSwRipSetting/.
- Layout: We provide neoTextil installations default layouts that you can use to create a print job (stored in /Users/ USER/Documents/neoTextil/Layouts/). When working with customized Print Server Layouts, they will be listed here too and copied locally in /Users/Shared/Inèdit Software/Layouts/.
- Size: Different size options.
- Layout: uses the page size defined in the layout
- Image: uses the full image size
- Custom: allows to definition of one custom size different from the layout or image size.
- Comments: for layouts with comments field only.
- Colorways: Working with multichannel files and nT Colorations colorways, you can select the colorway from the list (located on the preview) and create a print job. Currently without remote colorways support.
Currently without remote colorways support.
Some print server layouts are not compatible with types of colorways and need modifications. Contact Inèdit Software to request a modification.
Destinations
- Send to nT Job Queue: Send one print job from the nS QuickPrint Panel to the nT Job Queue Panel for document generation.
- Sent to neoStampa: Send one print job from the nS QuickPrint Panel to the Print Server queue.
- Export to neoStampa: Export one XJB print job to the disk from the nS QuickPrint panel.

neoTextil 8
Open a document with Adobe® Photoshop®, then display the drop-down options list from Window | Extensions and finally click on nS QuickPrint Panel. Or open the panel using the shortcut on nT neoTextil Panel.

Connect options
Option 1: Bonjour
Connect the panel using Bonjour to detect Print Servers in your network:

Option 2: URL
Using the manual option to add a printer. To do this click on the 'Add Printer' option and enter/paste the URL of your Print Server.

Security token
If your Print Server uses a 'Security token' to establish a connection in the Log system, you will need to use the token for the connection. The required field for the token will be present the moment you try to connect to the Print Server. Simply copy the token in Print Server and paste it into the nS QuickPrint Panel and continue with 'Ok'.

Currently without remote colorways support.
Some print server layouts are not compatible with types of colorways and need modifications. Contact Inèdit Software to request a modification.
Related articles:
